Thursday, November 8, 2012

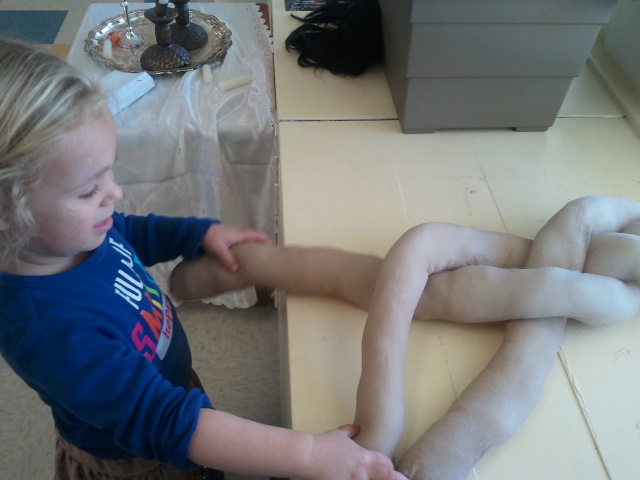
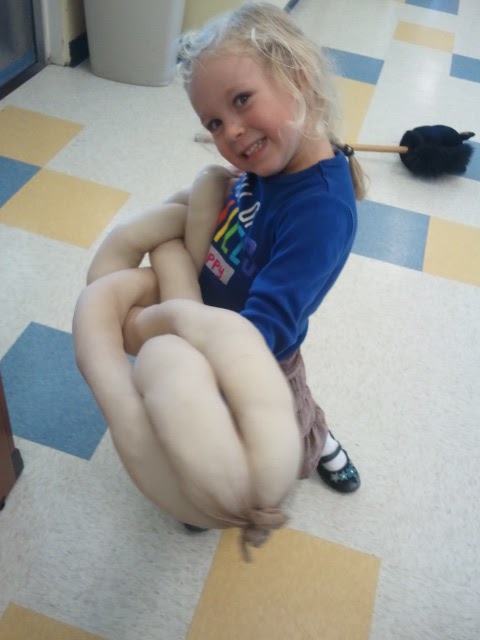
How old do you think you need to be to learn to braid?

We are up to the 7th day in our unit on CREATION!

On the 7th day, G-d Rested. 

We celebrate Shabbat, every week on day 7- Saturday!

What an exciting week we had filled with the joy & peace of Shabbat!

Our dramatic play center turned into a "Shabbat Center" all week long! Scroll down for more of how we learned & experienced Shabbat!


We weren't sure if this activity would be too advanced for our 3 & 4 year olds...but they proved us wrong! By Wednesday some of the children were fully braiding!


 "Look what I did!" (without any help!!)


We also learned something interesting about why we have 2 challah's each week, 

 and why we cover the Challah's and place them on a special plate- before we make a blessing on them at the shabbat table!


Through a puppet show, the children watched a little scene of the Jewish people, while they traveled in the dessert. They ate Munn. (miracle food that Hashem sent for them.) On Fridays- Hashem would send TWO portions of the Munn. (that's why we place 2 challa's on the table.) Another special miracle happened- Hashem protected the Munn- from below and above- coating it in a layer of dew. So we cover the Challa's and place a plate under them to remind us of that miracle!

We gave each child some tiny marshmallows to represent the Munn (delicious miracle food Hashem sent to the jews in the desert). Each child had a chance to say what they imagined it would taste like!


Then we sprayed little drops of water on it, for them to understand what DEW is!


Focus on #7, since we are up to day #7 (Shabbat.)


 Using our Montessori furniture, and various objects as counters, we worked on the children's math comprehensio, by having them place the correct number of counters, on the shelf representing that number. The staggered shelves help the children master the skills.


Mock Wedding at Gan!

This week's Torah Portion "Chayei Sara" tells the story of the Marriage of Yitzchak (Isaac) & Rivka (Rebecca.)
In this spirit, we held a MOCK WEDDING in our classroom on Thursday!

The way we introduced this story, was by telling the famous story of Avraham sending his messenger Eliezer to look for a wife for his son Yitzchak.

Through a puppet show the children learned the story of Rivka at the well, offering water to Eliezer's camels.


Now that the children understood that Rivka was going to be the wife of Yitzchak, we planned for a Mock Wedding to celebrate!

When the children arrived, the decorated classroom (Wedding Hall) put everyone into a festive mood!


Bridal Party included: Chaya- Bride, Noah- Groom, Rachel- mother of the Bride, Mendel- father of the Groom, Yitzy- Zaidy & Rabbi, Ellah- flower girl & Baker, Menucha- Mommy of Groom, Brocha Leba- Bobby!


Under the Chuppah!

Chattan (Groom) Sipping the Wine! Thank you Yitzy for singing the blessing so beautifully!

Kallah- (bride) sipping the wine!

Stepping on the Glass!

Dancing for Joy!

Dancing at the Wedding!


Raising the Bride on a chair!

Raising the Groom on a chair!

The Wedding Feast! Thank you Ella for decorating and bringing in the Cake!


Filling our week with Light!

We reached day #7 in our unit on creation!

In our theme of Shabbat, we learned that the SHABBAT CANDLES of our matriarch SARA (the very first Jewish Woman) stayed lit ALL WEEK LONG!


Hashem made a miracle that her Challa's stayed fresh all week (see post on braiding),

 her candles remained lit all week, and there was a cloud hovering above her tent. The children enjoyed placing the candles in our dramatic play center all week long!


Practicing to light the candles


Artists At Work....

We gave each child their own palette, along with a fine-tipped paintbrush to encourage fine motor development (pre-writing skill), color mixing (science), and attention to detail in their work (art).

They painted candlesticks, to take home! We hope your home will be filled with the light we see on the children's faces all week!


Tuesday, November 6, 2012

Why Bake with Kids?

Baking with Kids

Mom Baking with KidsRemember your first experiences in the kitchen? Maybe you helped your mother measure sugar for a cake, or stirred that big wooden spoon until your little arm ached. (Maybe you just licked the beaters!) The warmth, the aromas, and the teamwork all fused into lasting, loving memories.
Now you can re-create those happy moments with your own children, grandchildren, or nieces and nephews. Baking with children is a wonderful way to teach, share, and connect. And when you’re finished, you can have dessert!

Why Bake?

Besides creating delicious treats, baking gives kids the opportunity to:
  • Learn real-world math. Measuring teaches fractions. Cutting brownies or a cake into servings demonstrates division. And waiting for the oven buzzer helps kids understand units of time.
  • Develop patience and precision. If you mismeasure or skip a step, your baking project will disappoint.
  • Improve reading comprehension and vocabulary. Recipes are good practice for other kinds of instructional reading.
  • Cultivate scientific curiosity. What makes a cake rise? What happens when you heat chocolate? Kids love baking “magic” and the explanations behind it.
  • Organize and follow through. From shopping for ingredients through cleaning up, baking projects show kids the value of doing a job properly and thoroughly.

How to Get Started

Kid using Cookie CutterBasic Equipment
  • A set of plastic or metal measuring cups for dry ingredients
  • One or more glass measuring cups for liquid ingredients
  • A set of measuring spoons
  • Rubber or plastic spatula
  • Several wooden spoons
  • Rotary beater (the classic “eggbeater”)
  • At least three sturdy glass or metal mixing bowls
  • Cookie sheet(s)
  • Round or square cake pan
  • Oven mitt and hot pad
  • Apron
Baking success starts with appropriate expectations. Give kids jobs suited to their abilities, and praise them generously when they complete a task. Make sure each baking experience is a positive one, even if the results aren’t quite what you expected!
Children as young as two or three can participate in simple baking activities such as pouring, stirring, and decorating. By five or six, kids enjoy measuring, making cookie-cutter shapes, and using a rotary beater. At nine or ten, most children have the coordination to operate electric equipment such as blenders and microwave ovens and the reading skills to understand recipes.
For your first project, choose a recipe that uses familiar ingredients—sugar, eggs, flour, butter, chocolate chips—and basic techniques such as blending, stirring, and spooning. Many cookie batters can be “squished” with the fingers (much easier for kids than stirring with a wooden spoon). Brownies can be mixed, baked, and eaten out of the same pan to minimize cleanup.

Safety First

Kid Mixing Batter in a BowlIt’s natural to worry about safety in the kitchen. But with a little instruction, kids can learn to respect safety guidelines without feeling anxious or fearful.
Sharp edges and hot temperatures are a parent’s top concerns. Don’t let young children use sharp knives, and don’t let them use the burners or oven until they’ve had plenty of experience around the kitchen.
As you work with the range or oven, explain to your child what you’re doing and why. Show how to check that burners and oven are on or off. Always make sure that pan handles are turned away from the edge of the stove, so they can’t get bumped into by accident.
Other important precautions:
  • Knives. Even older children (ages 8 – 10) should be supervised when they use knives. Make sure knives are properly sharpened; a dull knife is more dangerous than a sharp one. Emphasize that knives are not toys. For most baked goods, a serrated plastic knife works just fine and is much easier and safer for kids to handle than a metal knife.
  • Burns. There’s no getting around the fact that baking requires heat, and heat can cause burns. Set a good example for young children by always using oven mitts or potholders when opening oven doors, using the range, and handling baking pans or cookie sheets. As they mature, allow them to do these chores while supervised.
  • Falls. Kitchen falls can be prevented if we remind ourselves that children are shorter than grown-ups. If kids can’t comfortably reach the countertop or kitchen table, have a sturdy stool or booster seat available.
  • Basic hygiene is one of the most important precautions you can follow. Wash hands with plenty of soap and water before starting and after finishing your baking project. Make sure hands are thoroughly dried when handling utensils, so you can maintain a good grip.

A Word About Mess

It’s inevitable with beginners. Here’s how to keep it to a minimum:
  • Spread newspapers over tables or countertops to minimize sticky messes.
  • Wear an apron. Small children can wear one of your old T-shirts over clothing.
  • Teach kids to clean as they go (and set a good example yourself).
  • Keep your temper…and your sense of humor.


CREDIT: http://www.dominosugar.com/family-fun/baking-with-kids  

Wednesday, October 31, 2012

Trip to the farm!

On Tuesday we took a trip to Underwood Farm in Somis.

As part of our larger unit on "Our World" we went through the 7 days of Creation. On Day #6 G-d created the animals!

The children enjoyed feeding the sheep, goats & Alpacas!
In addition to making the classroom learning real for the children, these trips bring our classroom community to a new level. The children's friendships and feeling as a  "group" become strengthened in a special way.

Enjoy the pics....


Feeding Carrots to the Alpacas!
 Look how high we can climb!
 Running through the corn Maize!

Picking Berries in the Orchard!

 Look at what we picked!
 Searching for the Berries!


Enjoying each others company on the "train."

Pies of Joy!

The most powerful way to teach a child what GIVING is all about,

 is to actually experience the act. 

This year, for Thanksgiving, we'll be partnering with our local S.O.S (Smile on Seniors) club, to pair up children/families or any individual in the community with a local senior, gifting them with the opportunity to bring Joy to another person in need.

Check out the information below...

We look forward to keeping you posted....


Friday, October 26, 2012

Environment as the third Teacher- Reggio Emilia

If you have stepped into our classroom this year, you will notice the great attention that is given to the look and feel of it.

Each of the centers in our classroom are thoughtfully designed and prepared by all of us as a group, in collaboration with other early childhood professionals to optimize small and larger group interaction, social learning and constructive play.

In the Reggio Emilia school of thought, it often refers to the environment as the "third teacher." The classroom environment plays a crucial role in the learning/teaching process.


 When thinking about how we would introduce the children to the creations of day #3 (plants, trees, earth...) we couldn't think of a more appropriate place to go...
Being outdoors, sitting on the grass, feeling the breeze, watching the leaves blow, hearing the sounds of nature...gave the children a real feeling for the "awesomeness" of the creations!

We asked the children what they could find that was "growing" or "alive." The discussion took us all around the outside of our school!

 We found different colored and shaped leaves...
 Children noticed the fuzzy feel of Lavender. (It's color and texture too!)


We decided to bring the outdoors in.... and each child picked seeds for a vegetable- that we planted in an indoor planter box! (Thank you FoodShare for giving us seeds last year!)
We walked around our classroom, and together found an appropriate spot to keep our plants! Where sun can reach....

Looking forward to enjoying peas, corn, parsley, sprouts, and more ...once they have sprouted...and we can transfer them to our outdoor planter!